Attaching Mounting Hardware to Your Aluminum Prints
At ALPrints.ca, we want to make it as easy as possible for you to display your stunning aluminum prints. For smaller orders, we typically pre-attach the mounting hardware for your convenience. However, when you order multiple prints (typically four or more), we ship the mounting hardware separately to make shipping easier and ensure your prints arrive in perfect condition. Don’t worry – everything you need is included, and the process is simple! Follow this step-by-step guide, and you’ll have your prints beautifully displayed in no time.
What You’ll Receive
When you order aluminum prints from ALPrints.ca, you’ll receive:
- Your premium aluminum prints
- 3D-printed mounting brackets with pre-applied Heavy-Duty Double-Sided 3M VHB Tape (these brackets attach to the aluminum plate)
- A 3D-printed mounting guide
- Mounting screws and drywall anchors

Step-by-Step Instructions
Step 1: Unpack Your Prints and Hardware
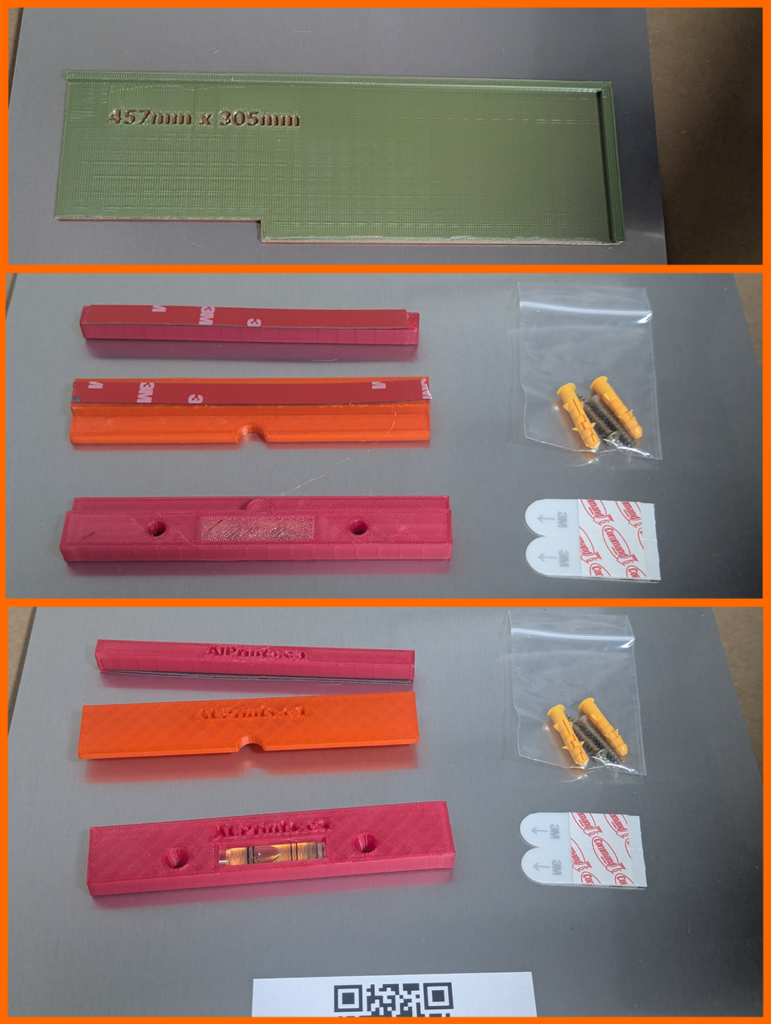
Unpack your aluminum prints and the provided 3D-printed mounting hardware. Don’t be alarmed if the hardware isn’t attached – it’s designed this way to make shipping easier.
You’ll find:
- A 3D-printed mounting guide
- Top hanging mounts with pre-applied 3M VHB Tape and a built-in level
- Bottom stabilizers with pre-applied 3M VHB Tape
- Screws and drywall anchors for extra stability if needed
Step 2: Attach the Top Hanging Mount
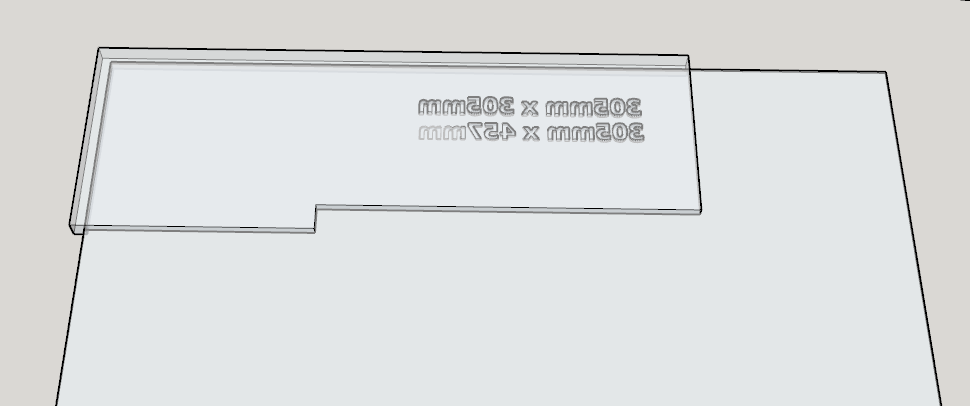
The 3D-printed guide is designed to make the mounting process effortless and accurate. It features a recessed edge that fits snugly along the edge of your aluminum print.

- Align the guide with the top edge of your aluminum print.
- Remove the protective backing from the pre-applied 3M VHB Tape on the top hanging mount.
- Press the top mount firmly onto the back of the print, aligning it with the guide for perfect placement.
- Hold it in place with steady pressure for at least 30 seconds to ensure a strong bond.

Step 3: Attach the Bottom Stabilizer
- Flip the guide 180 degrees so it aligns with the bottom edge of your aluminum print. The guide ensures precise placement for the stabilizer.
- Remove the protective backing from the pre-applied 3M VHB Tape on the bottom stabilizer.
- Press the stabilizer firmly onto the back of the print, aligning it with the guide.
- Hold it in place with steady pressure for at least 30 seconds to secure the bond.

Step 4: Hang Your Aluminum Print
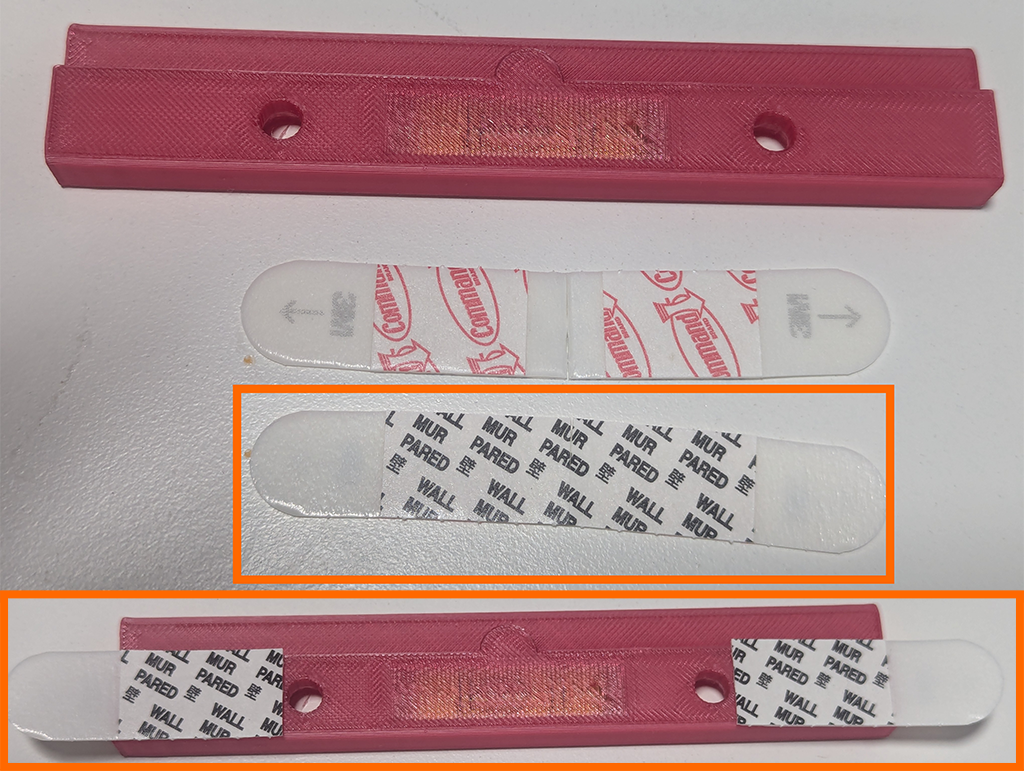
If you’re using Command Strips, attach them to the back of the top mount before securing it to the wall. Make sure the red sticker side adheres to the mount, while the side labeled “WALL” faces outward to stick to the wall. Follow the built-in level on the top mount to ensure it’s straight before pressing it firmly to the wall for at least 30 seconds.

From this stage on, your hardware is installed on your aluminum print. You can follow along below or even check our How to Hang Your Aluminum Prints with Our Ghost Mounts page, which includes a video as well :).
- Use the top mount to hang the print securely on the wall. The top mount features a rounded groove, which ensures the print is automatically centered on the mounting hardware and provides additional stability to prevent it from sliding off.
- The built-in level on the top mount will also help ensure that the print is straight once mounted.
- The bottom stabilizer is a straight bar designed to keep the print flush and stable against the wall for a clean, polished look.
For Extra Stability or Personal Preference
You can also use the provided screws and drywall anchors for added security. While two Command Strips are rated to hold at least 900 grams, and the largest aluminum print (305mm x 457mm) weighs approximately 505g, screws may be preferred in certain scenarios.
If you choose to use screws:
- Drill pilot holes where necessary and insert the anchors.
- Secure the mounts using screws for additional support.
Important Considerations for Command Strips
Command Strips hold securely on a variety of smooth surfaces, such as: Painted walls, Laminate and finished wood, Painted concrete, Metal, Smooth surfaces and glass, and Tile
Avoid using Command Strips on: Wallpaper, Fabric, Textured walls, Brick, Rough or uneven surfaces
By ensuring proper surface selection and installation, Command Strips provide a safe, damage-free way to hang your aluminum prints.
Why Ship Hardware Separately for Larger Orders?
When you order multiple prints, shipping them without pre-attached hardware helps:
- Protect your prints during transit
- Keep shipping compact and efficient
All necessary hardware is included, and the process is as simple as following this guide.
Pro Tips for Success
- Use the built-in level: The top mount’s built-in level ensures your print will hang perfectly straight, making installation even easier.
- Clean surfaces: Make sure the back of the print and the wall are clean and dry before mounting for maximum adhesion.
- Smooth walls work best: The 3M VHB tape adheres best to smooth, clean surfaces like painted drywall.
With ALPrints.ca, creating a gallery-like display of your aluminum prints is easier than you think. Just follow these steps, and you’ll be proudly showcasing your artwork in no time – no stress, no fuss!

